Friday, July 31, 2015

More Blocks this Week #chucknoharaqal


One of my favorite on-going projects right now is my Chuck Nohara Quilt Along, which I have written about before.  I'm especially finding myself drawn to the applique blocks, and am sure my balance of pieced blocks and appliqued blocks so far isn't very even, but oh well.  I really enjoy having the hand applique to work on when I sit.  Never used to enjoy it, but now actually really liking handwork.  Cuz I want to be quilting ALL THE TIME.

I started with the blocks by using needle turn applique.  After working on Carolyn Friedlander's Aerial Grove, I thought wow, needle turn is so easy and so fun!  NOT.  Sure, those 'squircle' shapes are soft and easy, not quite a circle, so of course they are fun and easy! When I tried doing some needle turn on my Chuck Nohara blocks, I found I wasn't actually too skilled at it.  Need some lessons with my friends Joyce and Diane, who ARE.

Shortly after I started #chucknoharaqal,  I took a one-day class with David Taylor, (a refresher, after having had a 3-day with him a few years ago) who uses freezer paper and starch to turn edges.  You trace the shape (reversed), onto freezer paper, cut it out on the lines, iron to your fabric, cut out the shape adding just a hair less than 1/4" inch seam allowance. Then paint some diluted liquid starch onto the seam allowance,  and using the nice finger-tip stiletto David prefers and the tip of your iron, press down the seam allowance onto the back of the freezer paper, holding it for 8 seconds. Keep it smooth and slow, no tucks, tiny bit by tiny bit.   Flip it over, press again, let it cool & pull out the freezer paper.  Voila!  I really like this method, am not too bad at it and very pleased with the results.

You say, so???   Well, so I started doing my pieces for Chuck Nohara with this technique! Works great for me!

Anyway, I got going this week on prepping some blocks.  Agonized over fabric selections, did the applique, and had blocks ready for stitching while sitting this week.  The first one, I had already done, but ending up taking it apart and re-doing it, cuz I just wasn't happy with it.  Now?  Happy!  I won't even bother posting the 'before' because I'm pretty sure you will say "Huh? You tore it out WHY?".  The important thing here is that I am happy.

block #1610

 And then I also made these:

#968
LOVE this cherry! #606


#725
#1845


#1846

 In between the 'chuck blocks', I made about a half dozen blocks requested by a fellow DAMQG member and Instagrammer that she will make into a quilt for  a friend of hers recently diagnosed with cancer.   The block is very cute and easy improv-style.  Color scheme green and grey, cut a piece of fabric 9" high, cut it in half, add a strip (width of your choosing) to the middle, cut in half the other way and do it again.  Then square up the block to 9" high,  ANY width you choose).  (I made one more, really skinny and tall, after the photo was taken). Very fun!


Then remembered I wanted to make a couple of charity blocks for DAMQG, #thatdamquiltalong.  Cuz in our guild, everything is some 'DAM' thing.  Rebekah C picks a pattern and palette each
 month, passes out this great flyer to us, and we bring the blocks the next month.  Someone then offers to assemble it, and the quilting and binding also shared by the group, whoever wants to take the next part.


 I also got 2 quilts spray-basted, one a charity quilt, not too big, and the other my Aerial Grove.  But that's a story for next time.....

Wednesday, July 22, 2015

UFO's Continued.....

I Forgot!!  I was going to give my count, so that you could feel happy that you had less, or excited that you had more, or whatever.  It wasn't a secret, I was going to tell, I just forgot!

12 quilt tops, either complete & ready for quilting, or needing a border or just a titch of work
18 sets of blocks, or blocks in progress

In the Bonnie Hunter Facebook group, Quiltville, they were very supportive but some scoffed and said what I had wasn't much.

Just sayin'.

Here's one more Chuck Nohara block I made yesterday, at my sit and stitch with DAMQG.  The shadows in the garden are a little funky, but I like the picture anyway....


Friday, July 17, 2015

UFO's, WIP's and such

In order to keep track of your work, you occasionally need to 'inventory', as it were, what is waiting to be finished.  Following Pat Sloan's New Year 2014 blog, I had done this, and I think I blogged about that at the time.  But 18 months have gone by.

At one of my smaller guild's meetings recently, some people were talking about their UFO's and seemed quite aware of where they were at.  I realized, at that moment, that I had been sewing like a bandit for the last 18 months and hadn't updated my list.  I do finish a lot of quilts.  But piecing is always my favorite part, so once I start putting things together, it's easy for my interest to move on to the next thing.

Got out my quilting notebook, counted up, checking everywhere.  Now and then I'd think oh yeah!!!  What about that?  And find another.

They were everywhere!

Neatly in marked boxes

Hanging on a quilt ladder

Hangers on the back of the door (I just now added the notes of what they still need)

On hangers in a closet

The back of a barstool (This one is immediately being spray basted!!)

In a basket (Bonnie Hunter's 2015 ystery, Grand Illusions)


I have to admit, counting them up, seeing it written in black and white, did freak me out a bit.  Me, who has boldly said to others that I don't feel the need to finish everything, I'm OK with that!! (I say loudly and emphatically, maybe waving my hands around as I say it!!).

I guess the important thing is to prioritize, figure out which projects I am actually interested in finishing.  The others I could finish as charity quilts, put on the free table at guild, or use for an upcoming auction at Great Lakes Heritage Quilters, which I think will happen in December.

Once I figure out what I want to finish, I can let the others go.  Get them off my list.  Lists intimidate.   They make you feel like you have to finish.  You don't!  You just have to get them off the list, one way or the other!  Doesn't matter how.  If you love it, finish it!  If you don't, get rid of it.  It's as simple as that.

Let's focus on the positive. I DID complete:

6 finished quilts to charity
2 large lap quilts (almost twin) for two of my kids (3rd one will be made in the next year)
TWO challenge quilts. 
A lap quilt for my MIL
2 baby quilts for niece's baby boy (1 was car seat size)
2 baby quilts for DAMQG's Treasurer's baby boy (one car seat size) 
Baby quilt and pennants for niece's baby girl
Banner for GLHQ quilt Show booth & 20 zippered bags
A wedding gift table runner
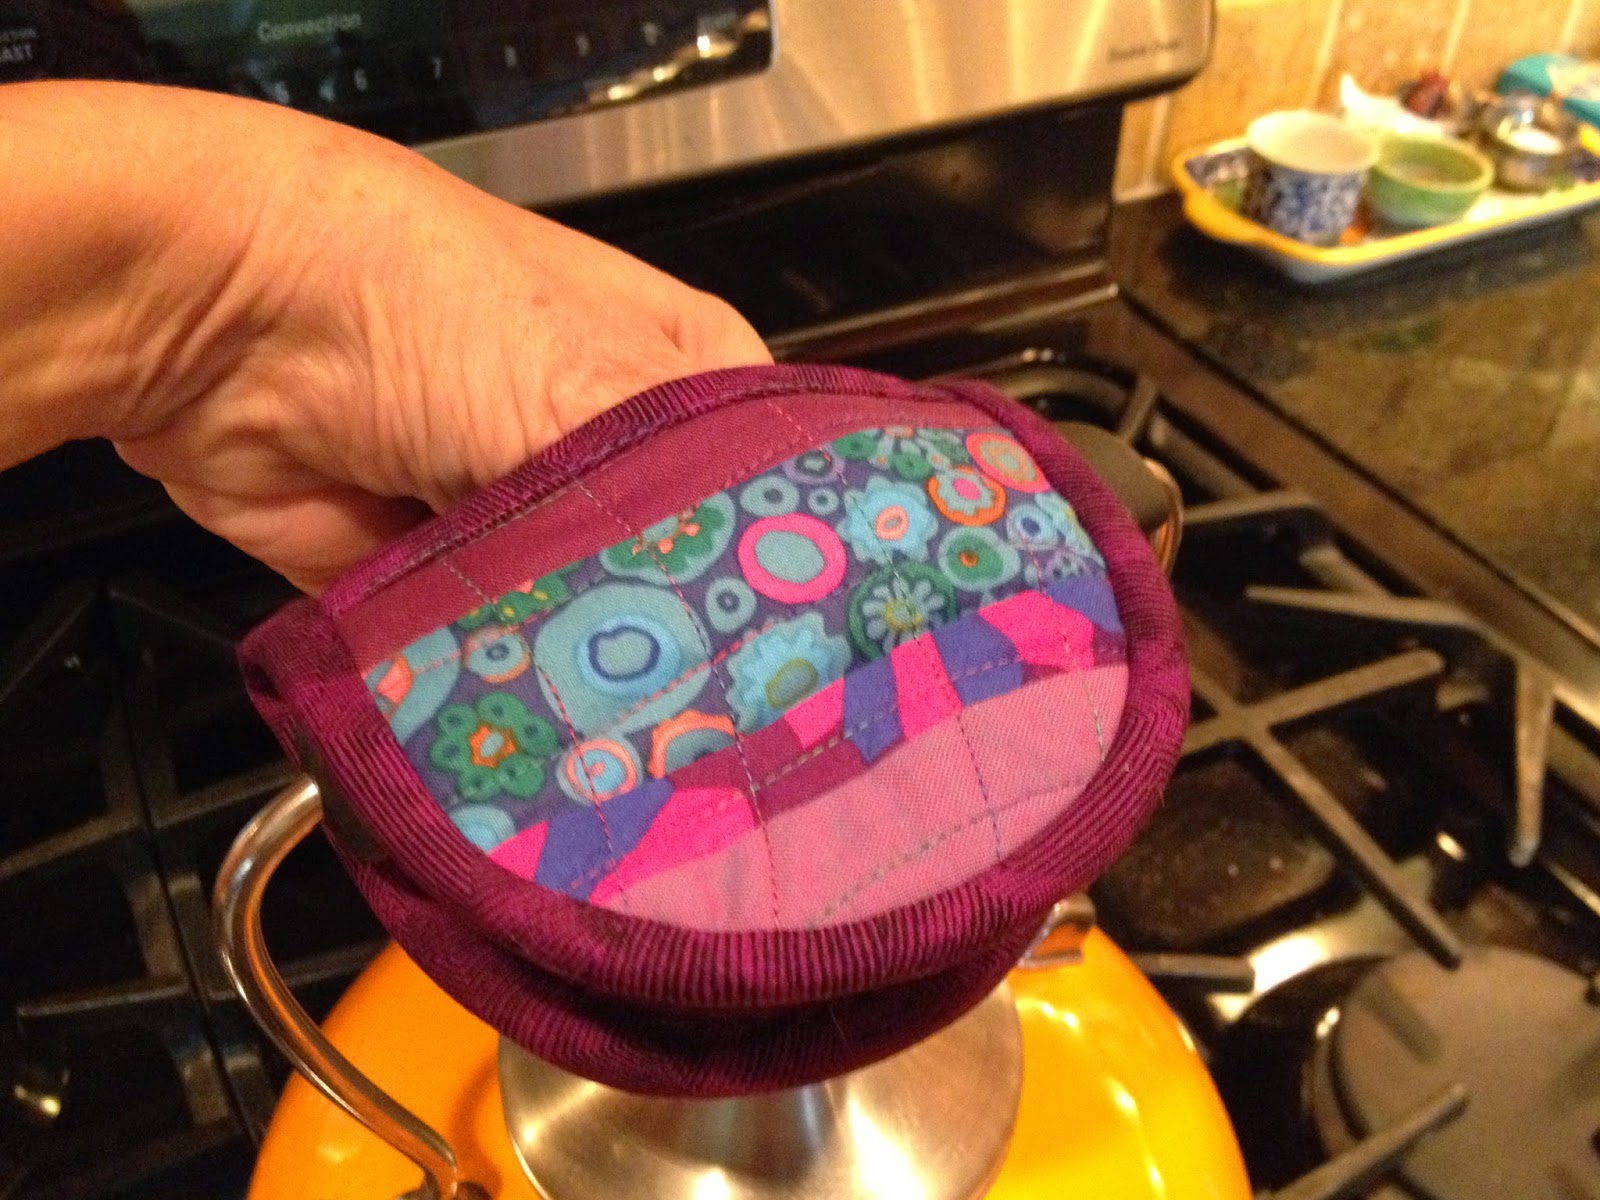
swap gifts for my secret Sister at DAMQG including a table runner, quilted postcard, pot handle holder and pot pinchers.

And I'm pretty sure I sewed some other things that I forgot to list.  I try to write all this stuff in my log, but sometimes forget.  PLUS, I pieced some of those tops and blocks that are currently listed as UFOs.

OK!  I don't feel so bad about the UFO's any more!  See: the 'Look there's a Squirrel' approach to quilting DOES work!  It produces a lot of clutter, boxes and stuff on hangers, but it also produces stuff for people to love and enjoy.

And that's what it's all about!

P.S.  It all makes me pretty darn happy too!

Wednesday, July 15, 2015

Chuck Nohara QAL

During the late winter I started following some posts on Instagram from people working on a quilt-along, or QAL.  I am loving Instagram anyway, and try to keep it 'quilty'.  For the most part.  The quilters I am finding there are doing some amazing work and inspire me so much!  The QAL I noticed was the Chuck Nohara Quiltalong, or #chucknoharaqal, if you want to look it up.

First, the book.


  Fabulous!!  I started to become obsessed, in the way that I do.  People said they could hardly find the book.  It is published by Quiltmania, and can be hard for those in the US to find.  So I happened to go to Quilt Festival in Chicago in April and was excited to see Quiltmania had a booth!  And the book! (and other great stuff as well, but I won't go into that now).

Purchased it, not intending to join in the QAL.  Figured, wow, it's gorgeous.  If all I do is just LOOK at it the rest of my life, I will be happy.  The patterns are black and white, you have to photocopy and then figure how to blow them up to the desired size.  There are no instructions!!!!  Intimidating!  You have to figure out how to piece them!


But as I looked on Instagram, at these FABULOUS quilters, I found one who had written a blog entry on how to do a block, how to approach the whole thing.  This was months ago, or I'd give you the link here.  The point here is, it gave me a way, an opening....an ITCH to jump in. Hmmm....I think I can do this.  At least SOME of the 2,001 blocks!!  You use many different techniques, regular piecing, paper foundation piecing, applique; the styles are endless.  And some are daunting.

So I did.  Pulled some fabrics, just to start with, by Denyse Schmidt.  These were a layer cake I loved, but hadn't dug into yet.  Added some browns.  Ok.  A starting palette.


The quilters running the QAL post an assignment (?) block or two every two weeks.  You can do one, both or neither.  It's up to you.  And you also do whatever else you want to do.  Photo them, post on Instagram using the #chucknoharaqal hastag, and also add the hashtag #cn and whatever number is on the block from the book, such as #cn765.  Those hashtags make it easy to look up either all the QAL blocks, or just a particular block, if you are interested in seeing what others do with a block.


I also found a use for this, my Quilter's Assistant.  You use it for enlarging or decreasing what you are photocopying.   Photocopy the page, cut out the one block you want to use, and put it on the copier.  You need to have custom' block size setting on your printer/copier. 

Measure the photo of the block (most of the black and white ones are 2.5")  With the 'Assistant',  turn one dial to the size of the picture.  Next, move that number to the size you want your blocks to be. Mine are 5" finished. Voila!!  The number in the box tells me the percentage of enlargement required!  Once you print an enlargement, double check it, measure right next to your copier, before using it, to be sure it is the size you want your finished block to be.  Sometimes you have to play with it a bit, the dial isn't as exact as it should be.

Soon, I was off and running, and posted my first blocks, #cn1029 on the left, and #cn969 on the right.

Others followed.  There have been quite a few more since then, I think my current count is around 28 blocks done.  Maybe, to keep me posting on a more regular basis (I just hate spending so much time on the computer!), I'll just post photos of a block or two once in awhile.

Meanwhile, I have enjoyed my Instagram friendships, looking at the work of these talented ladies, they have inspired me each and every day.  Maybe you want to hop on board?  I would encourage you---it's fun to have a longer term project, some handwork to tote around, stretch your skills a little.  But you can keep within your comfort level too.  It's a lot of fun!  Here's some eye-candy for you, with a few of my favorites, and a nice group pic of what I had at the time.......


Tuesday, February 3, 2015

How to Make Others Who Are Going through Tough Times Feel a Little Loved (or, Making Charity Quilts)

Both my guilds are collecting charity quilts, so in the spirit of FINISHING things, I got out a smaller top a few days ago that I made awhile back, with fabric even older than 'awhile back'.  I was playing with a pattern I've seen called cobblestones, and tried it out in two different styles of fabrics.  One is still blocks, the other was sewn together and just needed borders to make it the 3' X 4' size that Great Lakes Heritage Quilters is collecting this year.  This size is aimed at people bedridden or in a wheelchair.  I love the size in a purely selfish way---they are easy to sew, and easy to quilt.  The guild's collections efforts are really benefiting from the size the committee selected.  I've already made 4 or five, lost track.  Quilting these quilts are fun, no pressure, just relax, machine quilt, try things out, it's all good!!


 The picture below is during the free motion quilting process.  Before I started, I got a few books to look through for ideas and inspiration.  I chose what Angela Walters calls 'back and forth lines' and did them on the diagonal in each block.  Every-other block switches direction to make a nice over-all pattern.  I kept them bigger, as this is a lap quilt and should be soft and drapeable. 


As I sat stitching down the binding, I decided I was NOT happy with what I did in the border, so it all got ripped out, and re-done the next day.  For two sides I used some paper quilt-right-through-them border papers some de-stashed to me awhile back.  On the other two sides I did some diagonal lines, very simple, marked with chalk and stitched with the free motion foot.

Then, digging thru un-finished tops, I found one that was just a titch larger than the 3 X 4 size.  Picked a backing, got everything pressed and ready, and this one I will quilt next.  I initially made the pattern as a baby quilt gift but was unhappy with the results.  All finished up, I guarantee someone will be very happy with it!!  You can only see part of it here, but it's these columns of blocks. The sun coming through the window (LOVE IT!)  made it hard to get a better photo, a problem I'm willing to work around.


DAMQG (Detroit Area Modern) also needs quilts to donate, and those will go to a children's acute care unit. The nurses want them large enough to mostly cover a bed, so good-sized lap up to twin has been requested.  The children that get them are tiny up through about the age of 18.  The nurses have been thrilled when they are dropped off and can't wait to spread them over a bed to try to make a hospital room a little bit more cheery for an arriving child,  The child takes it home when they go.  A generous quilter in our guild who has a long arm quilting machine has been offering to quilt these for us.  This top was a Mystery Quilt we did at GLHQ two years ago. I wasn't really pleased with results, but hey, add a cute pink border and it's not looking too bad!  Not everyone is as picky as me. I got a backing pieced, pressed top and backing really nicely and it's on a hanger,  ready to be given to the longer-arm quilter at our guild meeting tonight!!  When she brings it back, I'll bind it and take a picture, you can see it finished later.....


I'd say that was several good days of work, wouldn't you?

Thursday, January 29, 2015

Squirrels......and coffee!!

It's morning, and I don't awake easily.  Slowly, quietly...... orange juice, vitamins, then, an immediate need for coffee.  My DH and I are the same way.  Coffee is made right away, in our french press, sipped on, NEEDED.  Once it starts to course through my veins, I am off and running, ready for my day! (Mug available here)


To celebrate coffee, I am sharing these images I found.  One I just saw recently, someone had shared it on Instagram and I particularly laughed about it.  The other I shared on my blog awhile back, but it's well worth sharing again.

So this goes out for me, and also for my friend, Joyce (a Chicken), also a HUGE coffee fan.  In fact, we have been known to sprint quickly across the vast lobbies of the Amway Grand, for AQS Grand Rapids, just to try to Coconut Mocha, much loved by Kim Diehl.  Sadly, Starbucks discontinued it, but, happily, I found Coconut Creme by Coffeemate---it's delicious and I am now addicted to it!!!

And, the BEST for last,

Photo found here: http://s592.photobucket.com/user/squirrelcannon/media/coffee-squirrel.jpg.html

Have a great day!!  I know I will, cuz I've had my coffee!!!

Tuesday, January 27, 2015

Red and White Challenge

My small group, the famous (infamous?) Chickens haven't had many challenges, maybe 4 or 5 over our 20 years.  People usually want to work on the current, must-get-done things, not devote precious sewing time to something new, something un-planned, maybe even un-wanted.  But a challenge from me make something red and white was received very positively.  The challenge was issued in early 2014 for June 2014.  Then delayed to October 2014.  Then.... December 2014.

December 2014 did dawn, and a beautiful party was held at member Joyce's home, where she made us fabulous food, lunch, drinks, dinner on a Sunday afternoon.  We've done many things over the years for Christmas, but for quite awhile now, Joyce opens her home and makes a very special day for us.

We were very excited for the unveiling!!  Some had just started their projects in September.  At least one, who shall not be named, started hers TWO WEEKS before it was due! (To her credit, it was completed!!)

I started mine in the winter of 2014, around March.  I knew exactly what I wanted to do:  The block was one I LOVE and have long wanted to make an entire quilt of.  The quilting was envisioned at the same time.  Certainty was a beautiful (rare) thing.  I usually wing it, make it up as I go.

THE BLOCK:  a traditional block, also loved by the modern quilters, and many variations are out on there on this pattern, which I LOVE.  Rolling Stone!!


THE FABRIC PULL:  90% from my stash, but I found I did have add a few, as I wanted each block to have different fabrics in it and not repeat.


Cutting and sewing ensued, furiously.  Blocks began to go up on the wall.  Pinterest helped me find variations.  I loved this setting with background lattice strips and squares of the reds that created almost a chain connecting the blocks.  Again, no doubt.  I knew exactly how it should go!


I think it's one of the nicest tops I've pieced, every seam so nice and neat and perfect.  It ironed beautifully, lay beautifully, all ready for quilting!

I thought I'd quilt it right after I went to the Holly Girls Camp in late September, as the camp was all about machine quilting.  It was a great camp, great teaching, lots of inspiration.  Unfortunately, my gall bladder delayed quilting til November.

THE QUILTING:  SPIRALS!!!!  With my walking foot.  I practiced many methods; walking foot or free motion. From center out, from edge in.  What felt the most comfortable to me was center out, with the walking foot.  I got the nicest lines that way, the foot kept me an even distance and the shapes nice.  These two photos are from Pinterest and were used for inspiration only.  The first by blog.chriswdesigns.com, and 2nd by inspirations.blogspot.ca


I used a process where I traced that center part onto a tissue paper, pinned it to the quilt block where I wanted it and stitched thru it, then removing the paper.  This insured that my centers were consistent.  After that, it was very comfortable using the walking foot to measure my distance, keeping me in line for a relatively pleasing, consistent spiral.  I filled each block, then added background spirals that looked like they were 'under' or 'behind' the larger ones.  For doing the quilting on my machine,the quilt had to be 'packaged' into square sections, as spiraling around with the walking foot meant a lot of quilt movement.  There were some that thought I was crazy for doing it this way, so much moving around, but once I got going and had a system, it was very comrtable and I got the results I wanted.

The packing, how it looked when it went under the needle

The paper to create the center perfectly shaped
And the results!  Named "The Refresh Button"!  I've been collecting phrases that delight me, and get the envelope out when it is time to name a quilt.  I look through and see if there is somethere that I think suits the project.  This time, there was.  The Refresh Button suits it.  Classic pattern, classic color scheme, but with a fresh, contemporary look that suits our time.


Before binding


The reveal was a lot of fun, but some were in still progress.  One was blocks in a box!  But everyone's piece has progressed since the photos below, and we are hoping to have them exhibited in a group at our guild's quilt show.  These photos do not adequately show you these wonderful quilts, so come to the show. The diversity of these projects was amazing and reflect the range of interests of our group of very talented women.  I am honored to be part of this group.


The  Great Lakes Heritage Quilters Quilt Show, will be held February 27-28, 2015 at Canterbury Village.  The show will be spectacular, I promise!  The guild has many talented quilters and the setting is beautiful, you will almost NEVER see a quilt show anywhere similar to this beautiful place!  It is held in the King's Court Castle.  There will be vendors for shopping,  you can lunch in the restaurant, there are also quilt shops not too far; all the makings for a perfect day.  Come join us!!!

Saturday, January 17, 2015

Pictures---will they make up for the long absence?

Some of the things I made over the fall were for my Secret Sister project at Detroit Area Modern Quilt Guild (DAMQG), or as we fondly refer to it, that DAM guild.  In fact, everything is DAM.  We are DAM girls, we have that DAM Quiltalong, when we demo a tool it is 'What is that DAM thing.'.  Just goes to show you can be silly at any age!

We are a relatively new guild, so our first two autumns now we have done a Secret Sister to get to know one another a little better.  We fill out a card with a little info about ourselves; favorite color, what type of thing we'd like (such as for the kitchen or for organzing or whatever) and then draw names.  We then gift our sister as we'd like from October til the big reveal at our Christmas party in December.  We may send a card, candy, bring a gift to the meeting (sneakily of course), hand-made or not.  We've kind of saved the last for the bigger thing they may want, the last fireworks explosion, if you will.

Here are the things I made my sister:

First, a machine quilted fabric postcard.  I've heard you can actually stamp and put in mail, but I was 'chicken' and put it inside an envelope, to protect it during mailing.  The other side is written on with a Pigma Pen to look just like a post card, with a stamp, name and address and message from 'secret sister'.  I had to omit that picture as it did have her name and address. Ooops!!


 Then I made her couple of things for the kitchen that I thought would be fun to have, a handle for cast iron skillet or other long pan handles that get hot, and a quilted pot pincher.  She said her favorite color was plum.  Funny how when someone says a name like that for a color you think you know exactly what they mean....then the doubt creeps in....what IS plum?  Is it a reddish purple?  A blue-ish purple?  Shaded? tonal??  Then you have to search on the web, but colors on a computer screen are always doubtful.  But I did the best I could!


Lastly, I made her the top item she wanted, a table runner.  I actually put the blocks together at a retreat we were at together.  Quietly.  Stealthily.  Late into the night.  As in, I turned out the lights in the sewing room because everyone else had already gone to bed!!


I can't remember the dimensions, although I'm certain I wrote them down, but I think it was about 16" wide by 48" long.  It was a lot of fun, and besides her favorite color, I used MY favorite color---green, mossy or limey.  And the color wheel LOVES that combo too!  I used some great background creamy-off-white based prints, using texts and others, the purples and greens.  The quilting was a lot fun, nothing like working on a very manageable size.  The loop-de-loops on the background fabrics were the BEST part,


It then occured to me that I absolutely had to make a Christmas stocking for my nephew Eli, youngest family member, and 6 years old at Christmas time this year.  Plus he loves getting packages in the mail.  Helps remind him he has a loving auntie in Michigan!


My other guild, Great Lakes Heritage Quilters (GLHQ) has a WORD quilt challenge this year that I am mentally preparing for, so I did some paper-pieced letters, a skill new to me, for his stocking.  The capital 'E' came out really good, but did not fit on the stocking well, so I saved it it.  Eli loved his stocking and it was proudly displayed when we visited Oregon for the holidays!

So that's all for now, but I have been busy sewing and hope to update you on that soon!